Let’s talk about bottom brackets. BB30 to Shimano Hollowtech2, for example
January 17, 2013 2 Comments
I see the BB30 standard as a good idea, and so far seems the longer lasting and more compatible one.
The idea of having the bearings easy to replace is a good thing, and so is the narrow b.b. shell to achieve a low Q-Factor whenever the cranks are made to be “BB30 native”.
But this has drawbacks, the bearings easy to replace are actually too thin in width and prone to mis-alignement; and the narrow b.b. shell makes the bearings being in an unfavourable position when adapters are used.
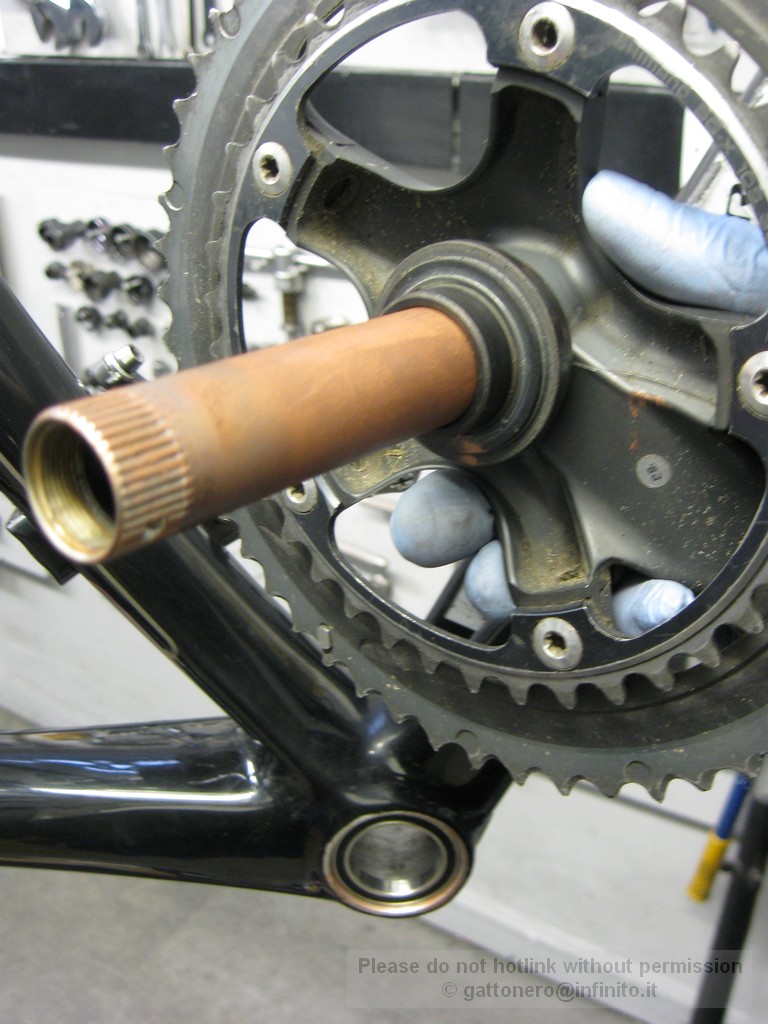
In this case, the frame is BB30, and Shimano Hollowtech2 cranks are used.
The adapters are the widely used and reliable Wheels MFG; nothing more than two blocks of hard Nylon machined to good tolerance.
Let’s start by removing the cranks.
Pinch-bolts have to come undone. Make sure that the allen key is a good one, those bolts have to be tight when fitting the cranks (12-13Nm), and their head is prone to get rounded. Be wise then

Now is time for the preload cap to be removed. Use the specific tool, like the Shimano TL-FC16 or the Park Tool BBT10 shown here. There’s plenty of compatible ones on budget, they do the job: this cap is meant to be “finger-tight”.
Oh, there’s fancy alluminium ones, mostly to be moved via an 8mm allen key. Just be careful to not get carried away by that long allen key handle…


Note the “safety plate” in between the slot, lift it up before removing the L/h crank
Slide the R/h crank altogether with the axle, gentle use of a rubber mallet may help. Do not touch the rings, if you have to, go on the spider on alternate points.
Then the b.b. shell is left with the BB30 adapters, to remove them you can use two plastic tyre levers. I won’t recommend to use a Splice tool (like the one to remove headset cups), for a couple of reasons.
First, it won’t go easy trough the hole (tool is more than 1″, hole is 24mm); second and important thing, is that you may actually catch the circlips that work as a shoulder for the BB30 bearings. That would make a bit of a mess.
Also, I like to limit any “hammering” on the frame, especially if we consider that is very likely we’re dealing with a carbon frame…

For the same reason as the second and third one above, for removing the bearings I do prefer this little tool.
Very effective, would catch the bearing from the inside (note the moving flaps), then extract it with the screw attachet to the flaps. Genius.


Neat!


Now let’s clean the b.b. shell from inside. Note the circlips in the second picture


This anti-seize from Finish Line is actually a variant of the “copper-grease” used in automotive industry.
It is very effective in preventing rust and corrosion between any kind of metal. It is also very sticky, this mean that would not get “moved” when a part works on it, it is very adhesive (and stains your hands and clothes!)

Fresh new bearings.
BB30 use the size “6806”, which is 30x42x7. They do exist in various levels of quality, my opinion is that there’s no particular need to spend 50 bucks for one bearing, get one that is good quality (SKF, INA, FAG, Enduro, etc.) and press it correctly: it is pointles to have the best quality of bearings if you have to hammer them in, and/or leave the not well aligned.
This press is made by Wheels Manufacturing, you can have it alone, with a choice of drifts, or with full kit of drifts.
I do have a panel of bearing drifts 🙂

The same Anti-Seize on the crank spindle, note that when the adapter slides onto, the Anti-seize is very much entirely still in place, and the adapter fits just tight enough.

We’ll fit the R/h crank with the spindle (well, that is obvious, it’s a one-piece) and the R/h adapter on. not shown here (you can see below) is the Anti-seize on the inner and outer part of the adapter, the part that holds onto the spindle and the bearing.
But first, a run of grease just off the inner border of the b.b. shell: this will reduce the water seeping in

Normally, the spindle with the R/h adapter, and the L/h adapter, will go by hand


Anti-seize on the L/h crank clamping area, too; then the preload cap goes in position again. It has to be finger-tight. Check that the cranks would spin as free as possible, still no axial play is allowed


Don’t forget to check the safety plate: if you can’t push it down in position until it almost “clicks”, then the adapters are probably not fully seated. This makes the L/h crank not clamping on enough portion of the axle.

If the safety plate can be pushed down correctly, the you’ve done well. Now tighten the two pich-bolts to 12-13Nm.

And that’s that
–
